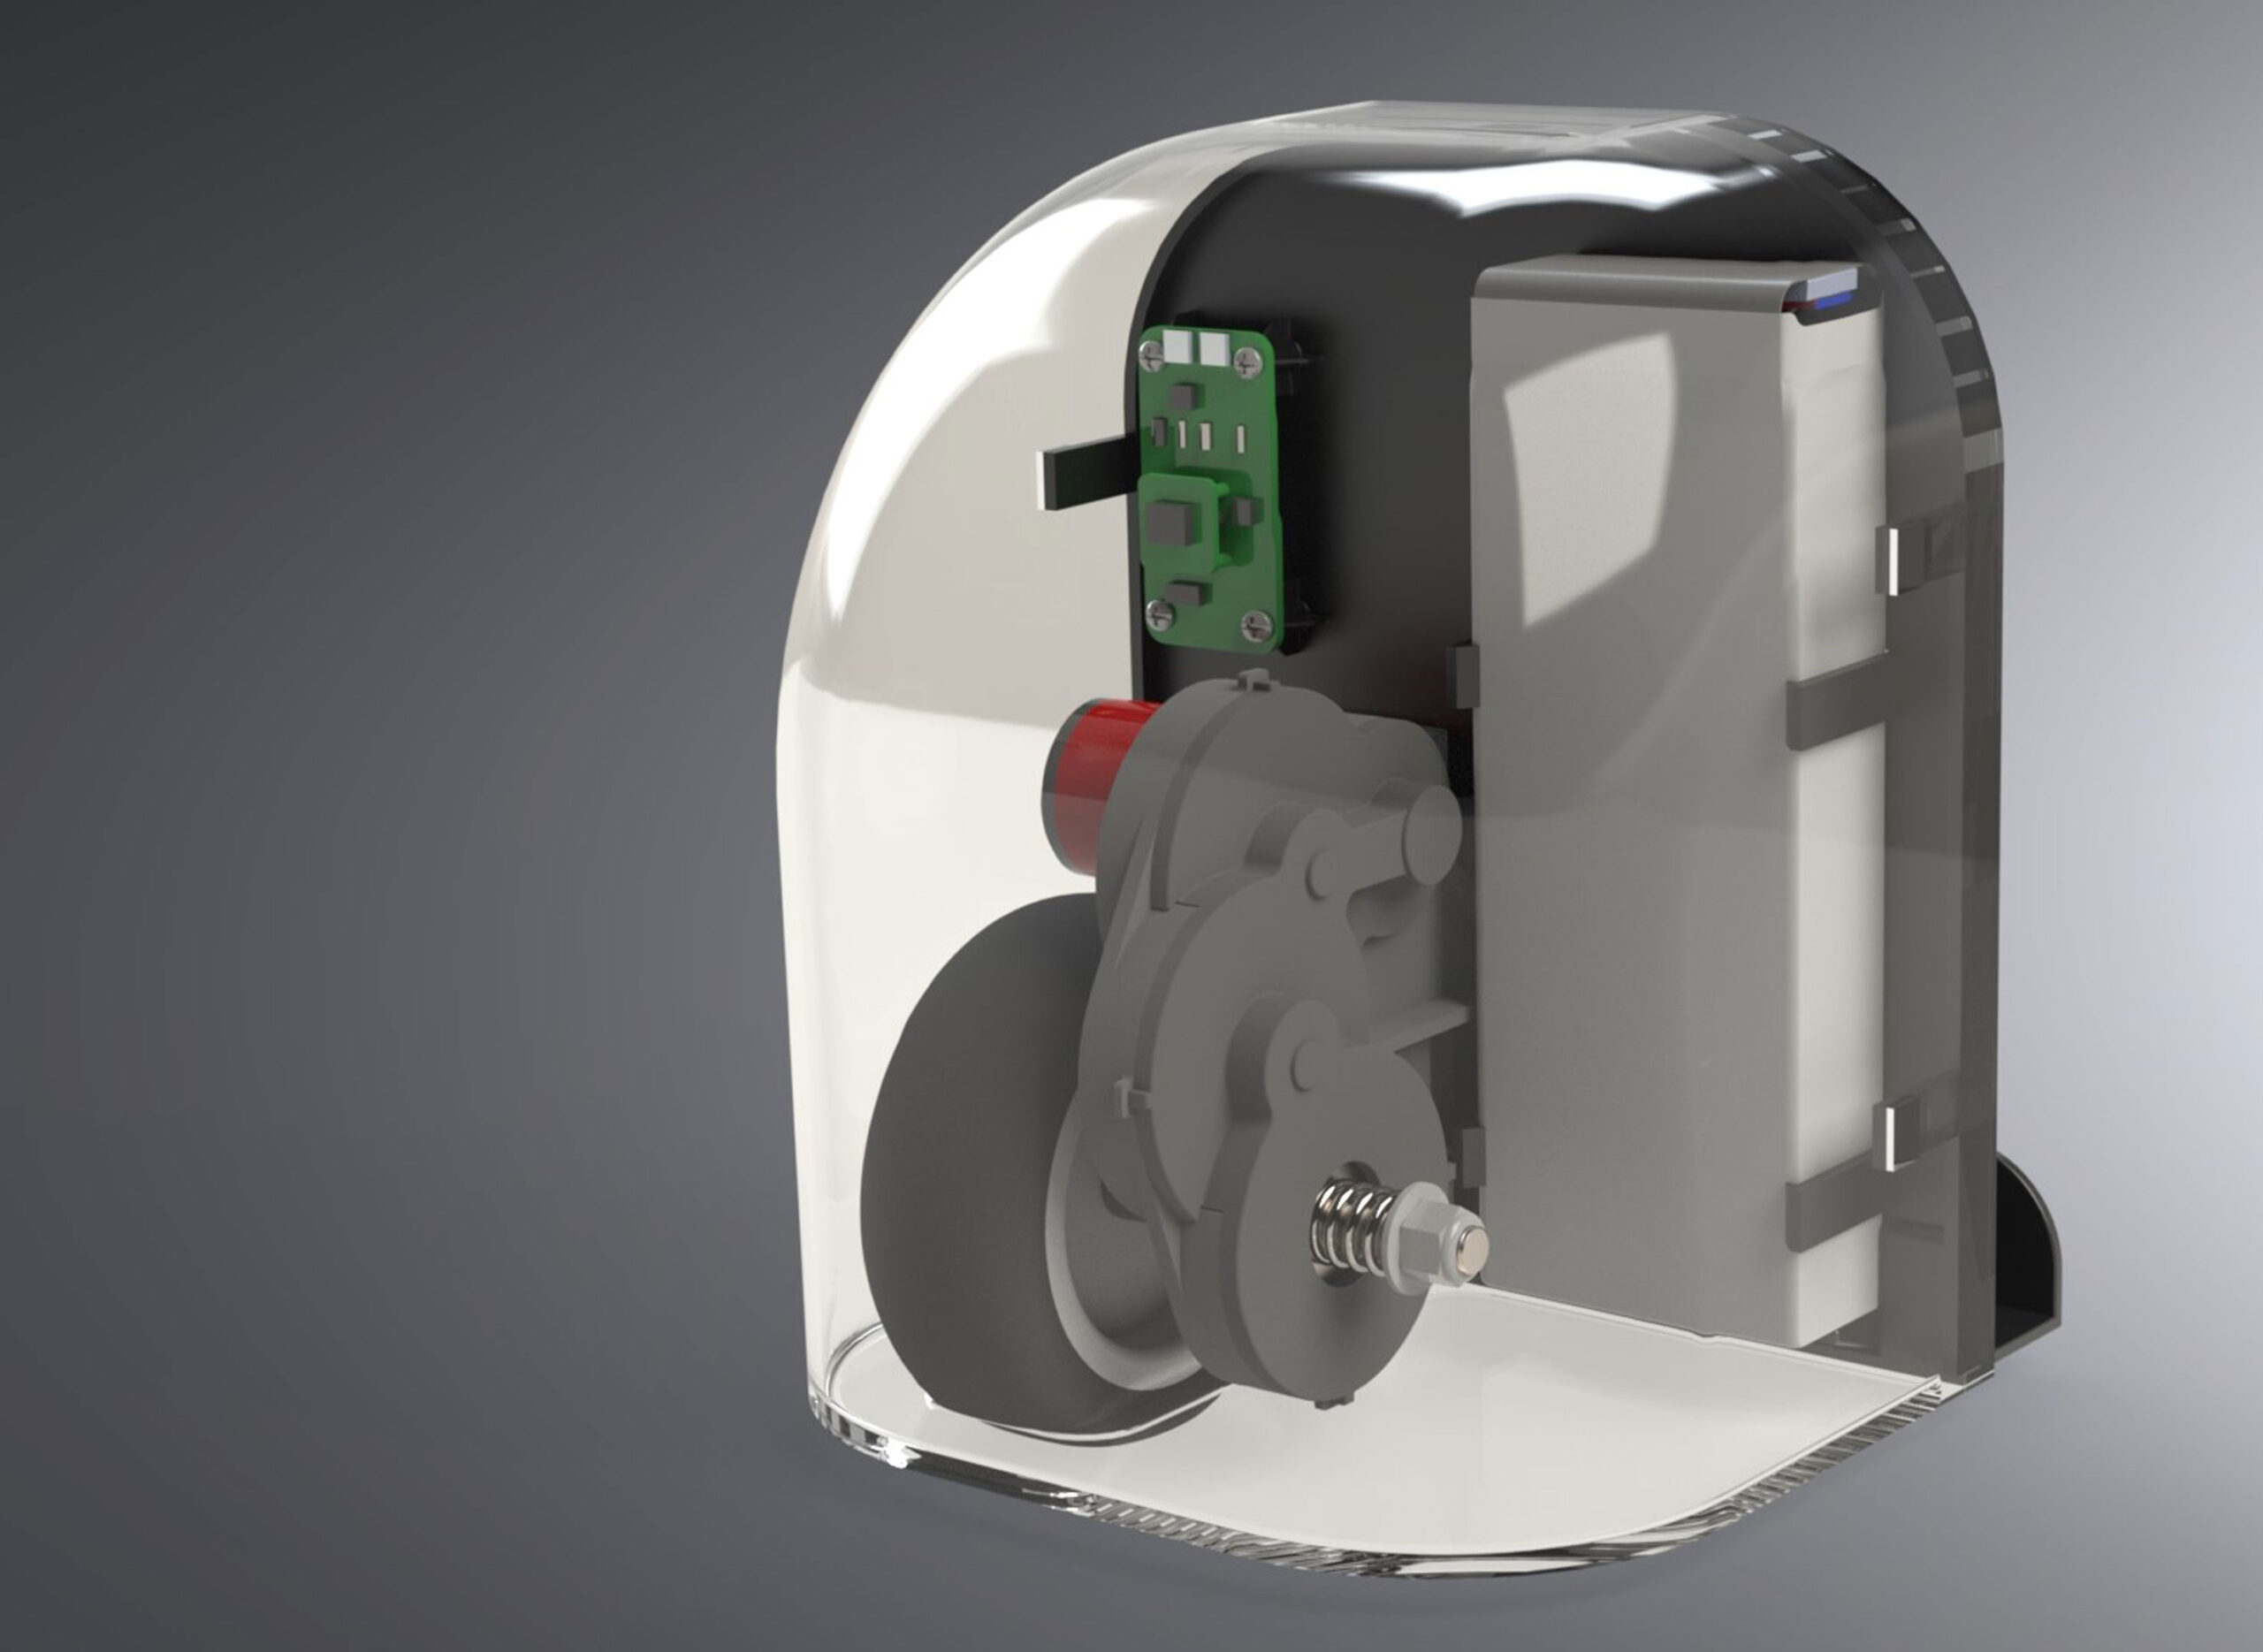
Aperio is an easy-to-install and inexpensive automatic door opener, designed to improve the lives of those with physical disabilities.
Objective
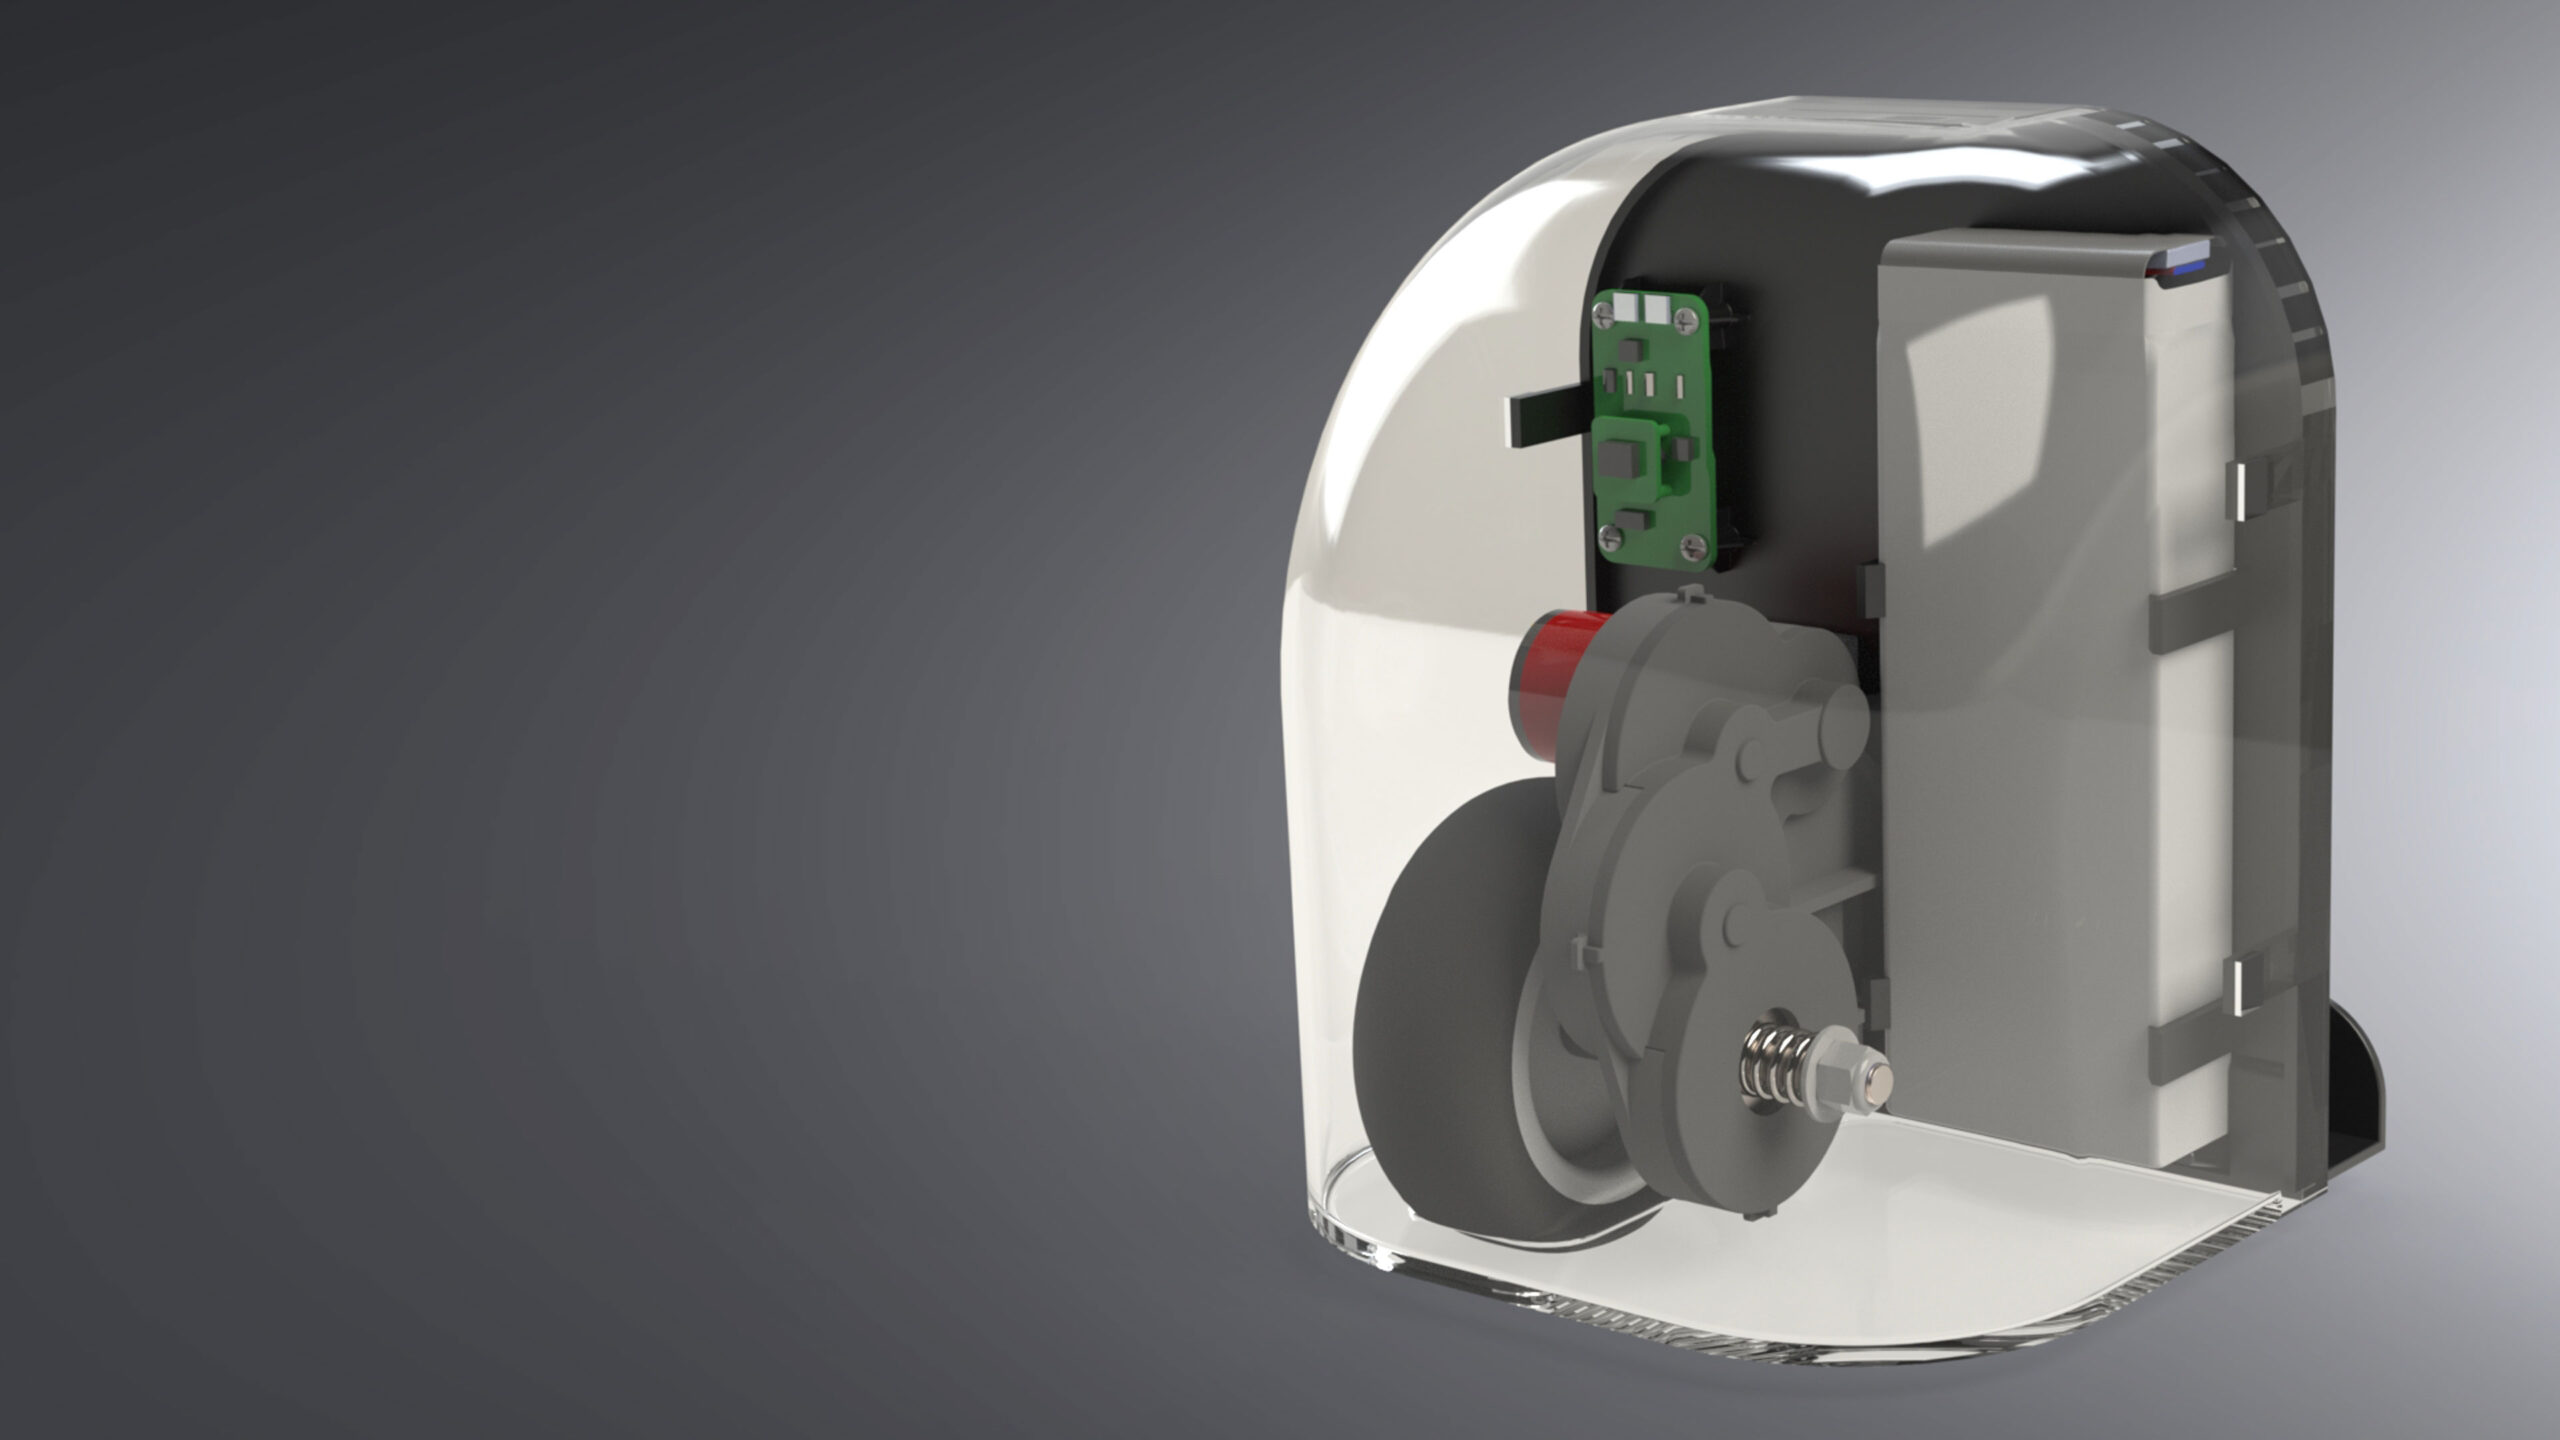
The purpose of this project was to take a product from the functional prototype / proof of concept phase to a manufacture-ready product. In a previous course, two of our teammates developed a functional prototype for an automatic door opener, seen here. Everything seen on this page from here forward is work that we accomplished during the last half of the semester.
Limitations
$0 budget
Duration
One academic semester (Spring 2019)
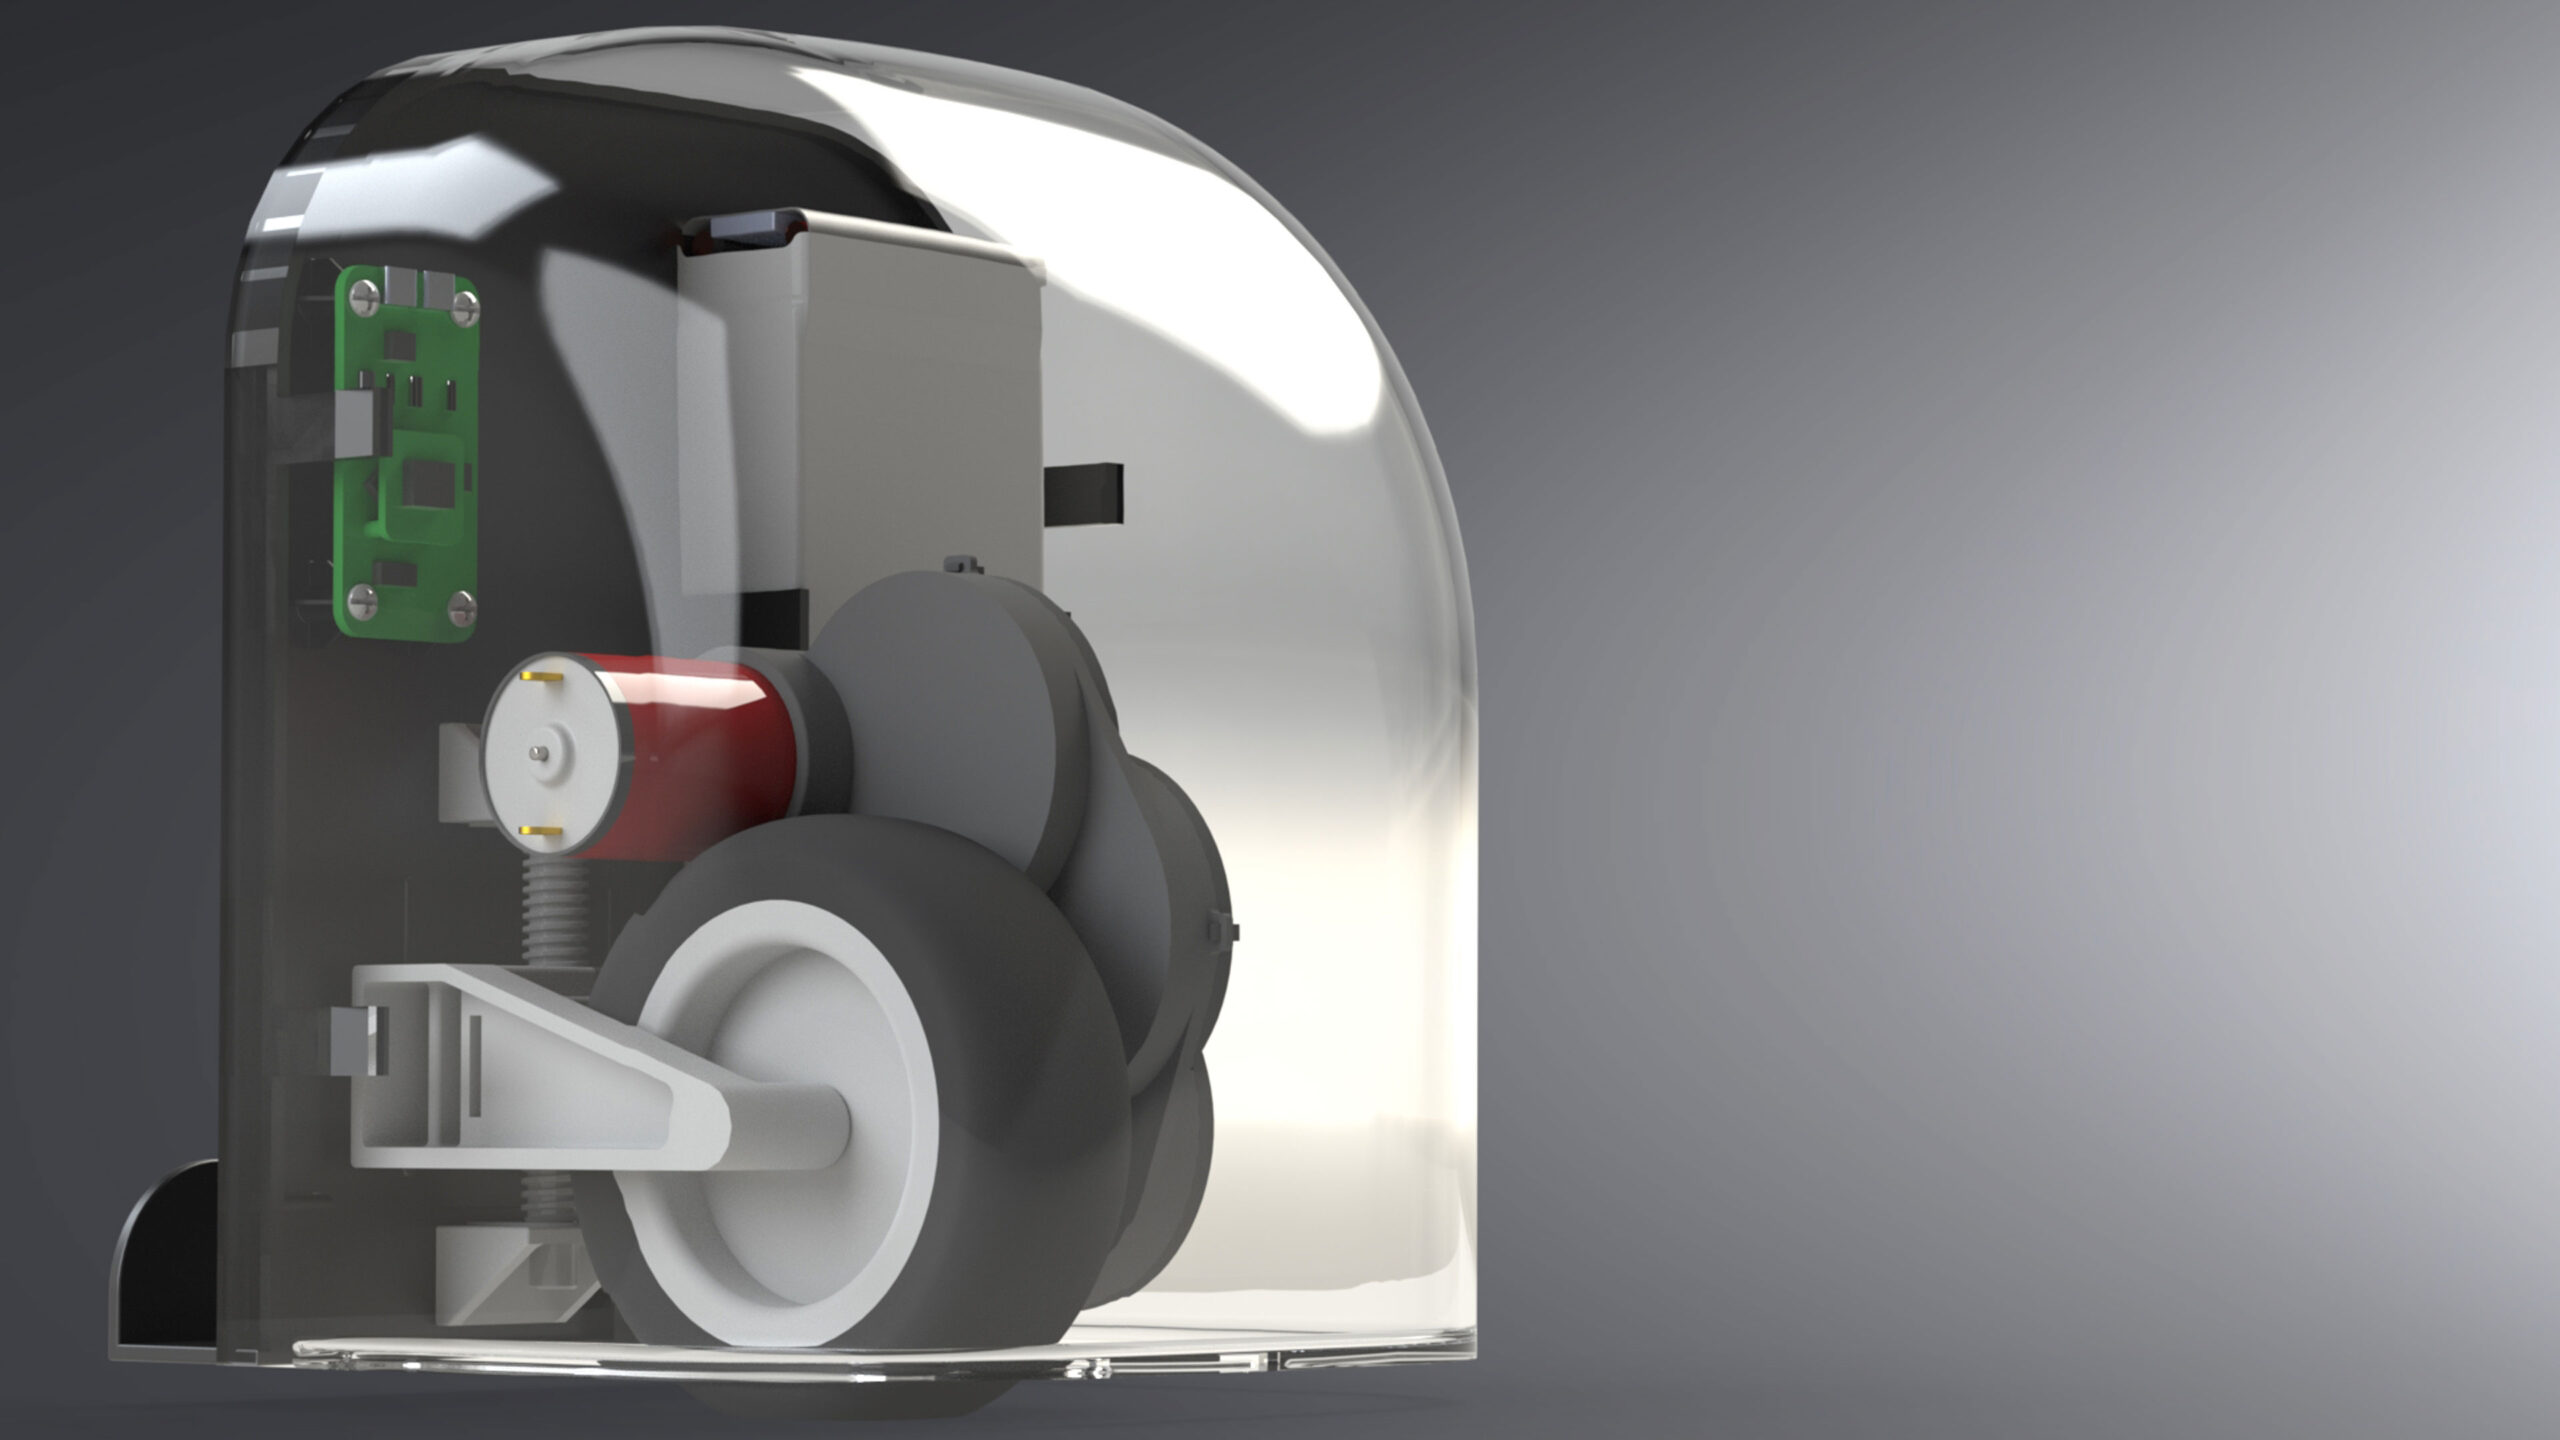
Product Functionality
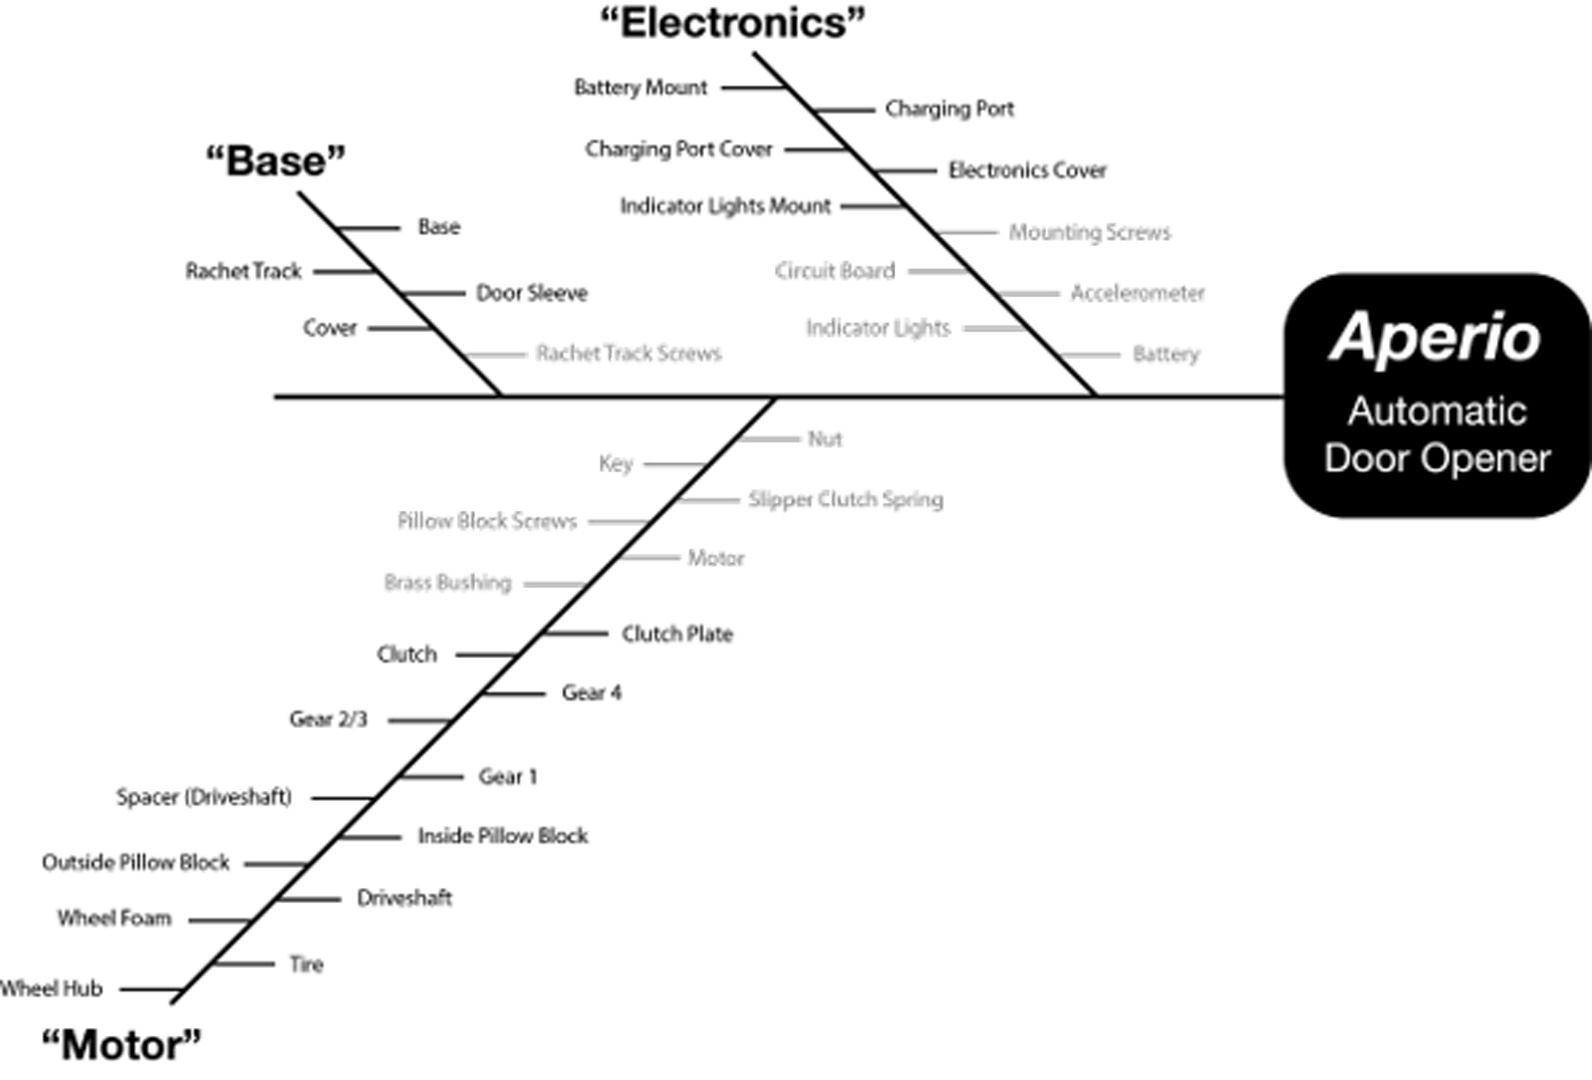
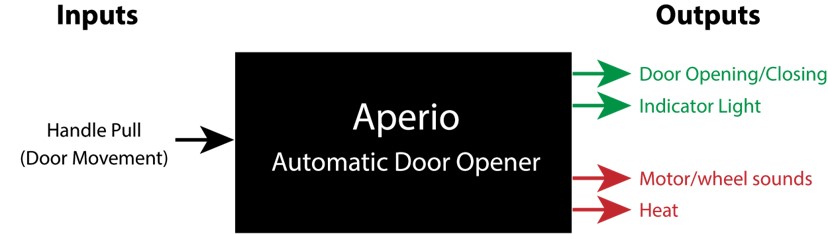
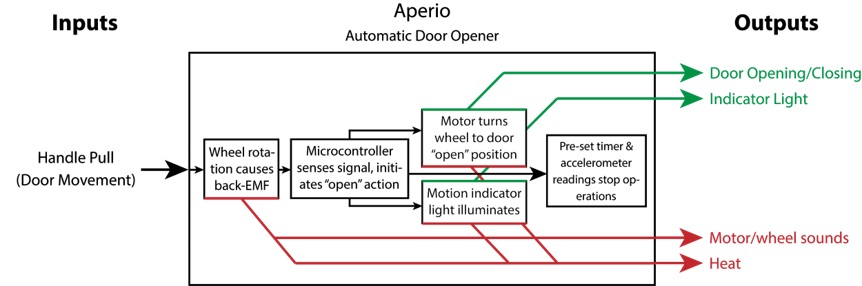
The first step for this project was to make sure that our entire team had a complete understanding of how Aperio was going to function. To help with this, we created black box and glass box diagrams to understand the product both from a user’s standpoint and from a design standpoint. We also created a fishbone diagram, breaking down the product into more manageable subassemblies.
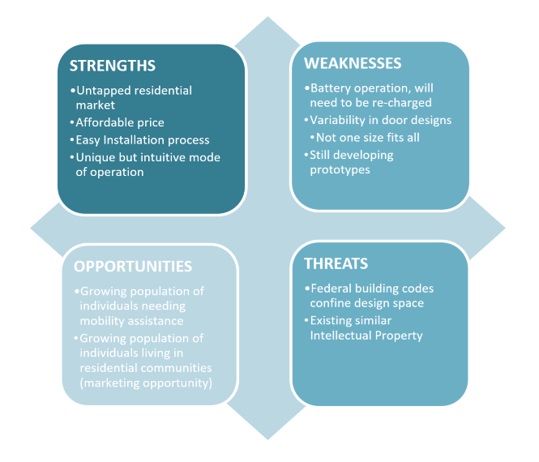
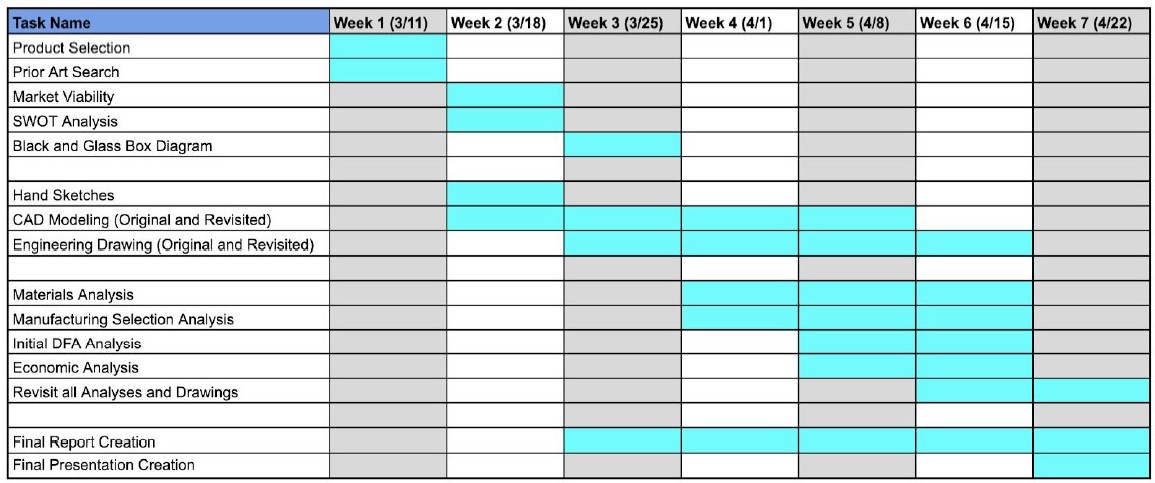
Project Management
Due to the iterative process, design can often take longer than anticipated. Beginning a process by anticipating bottlenecks and other difficulties that may arrive can help save time in the long run. To help visualize this, we developed and updated a SWOT analysis and ghantt chart. diagram, breaking down the product into more manageable subassemblies.
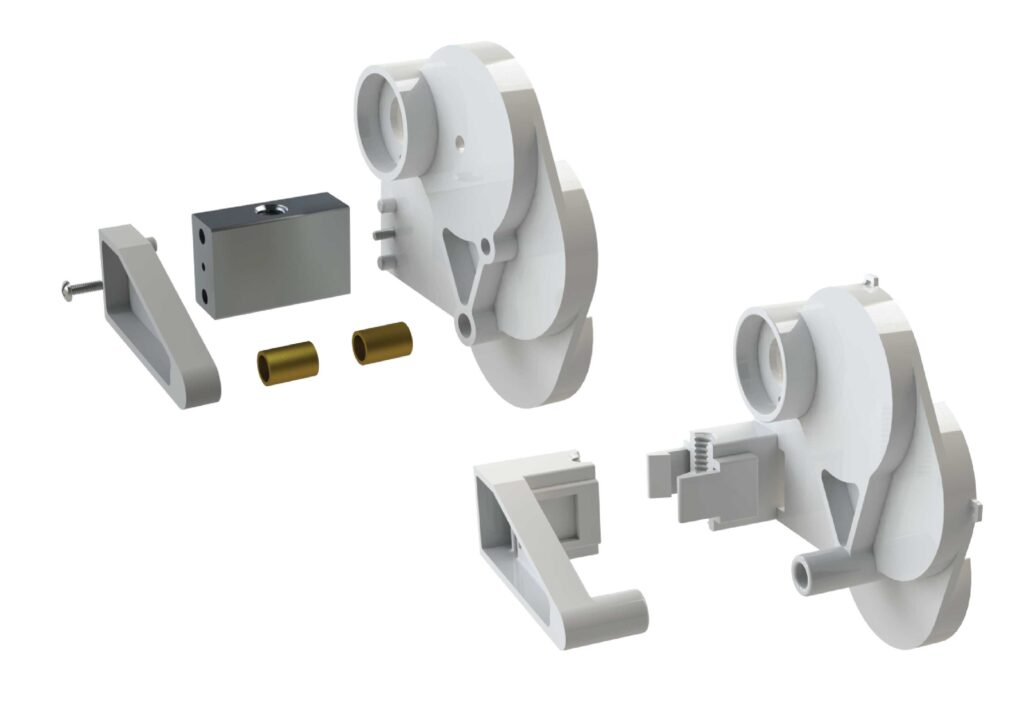
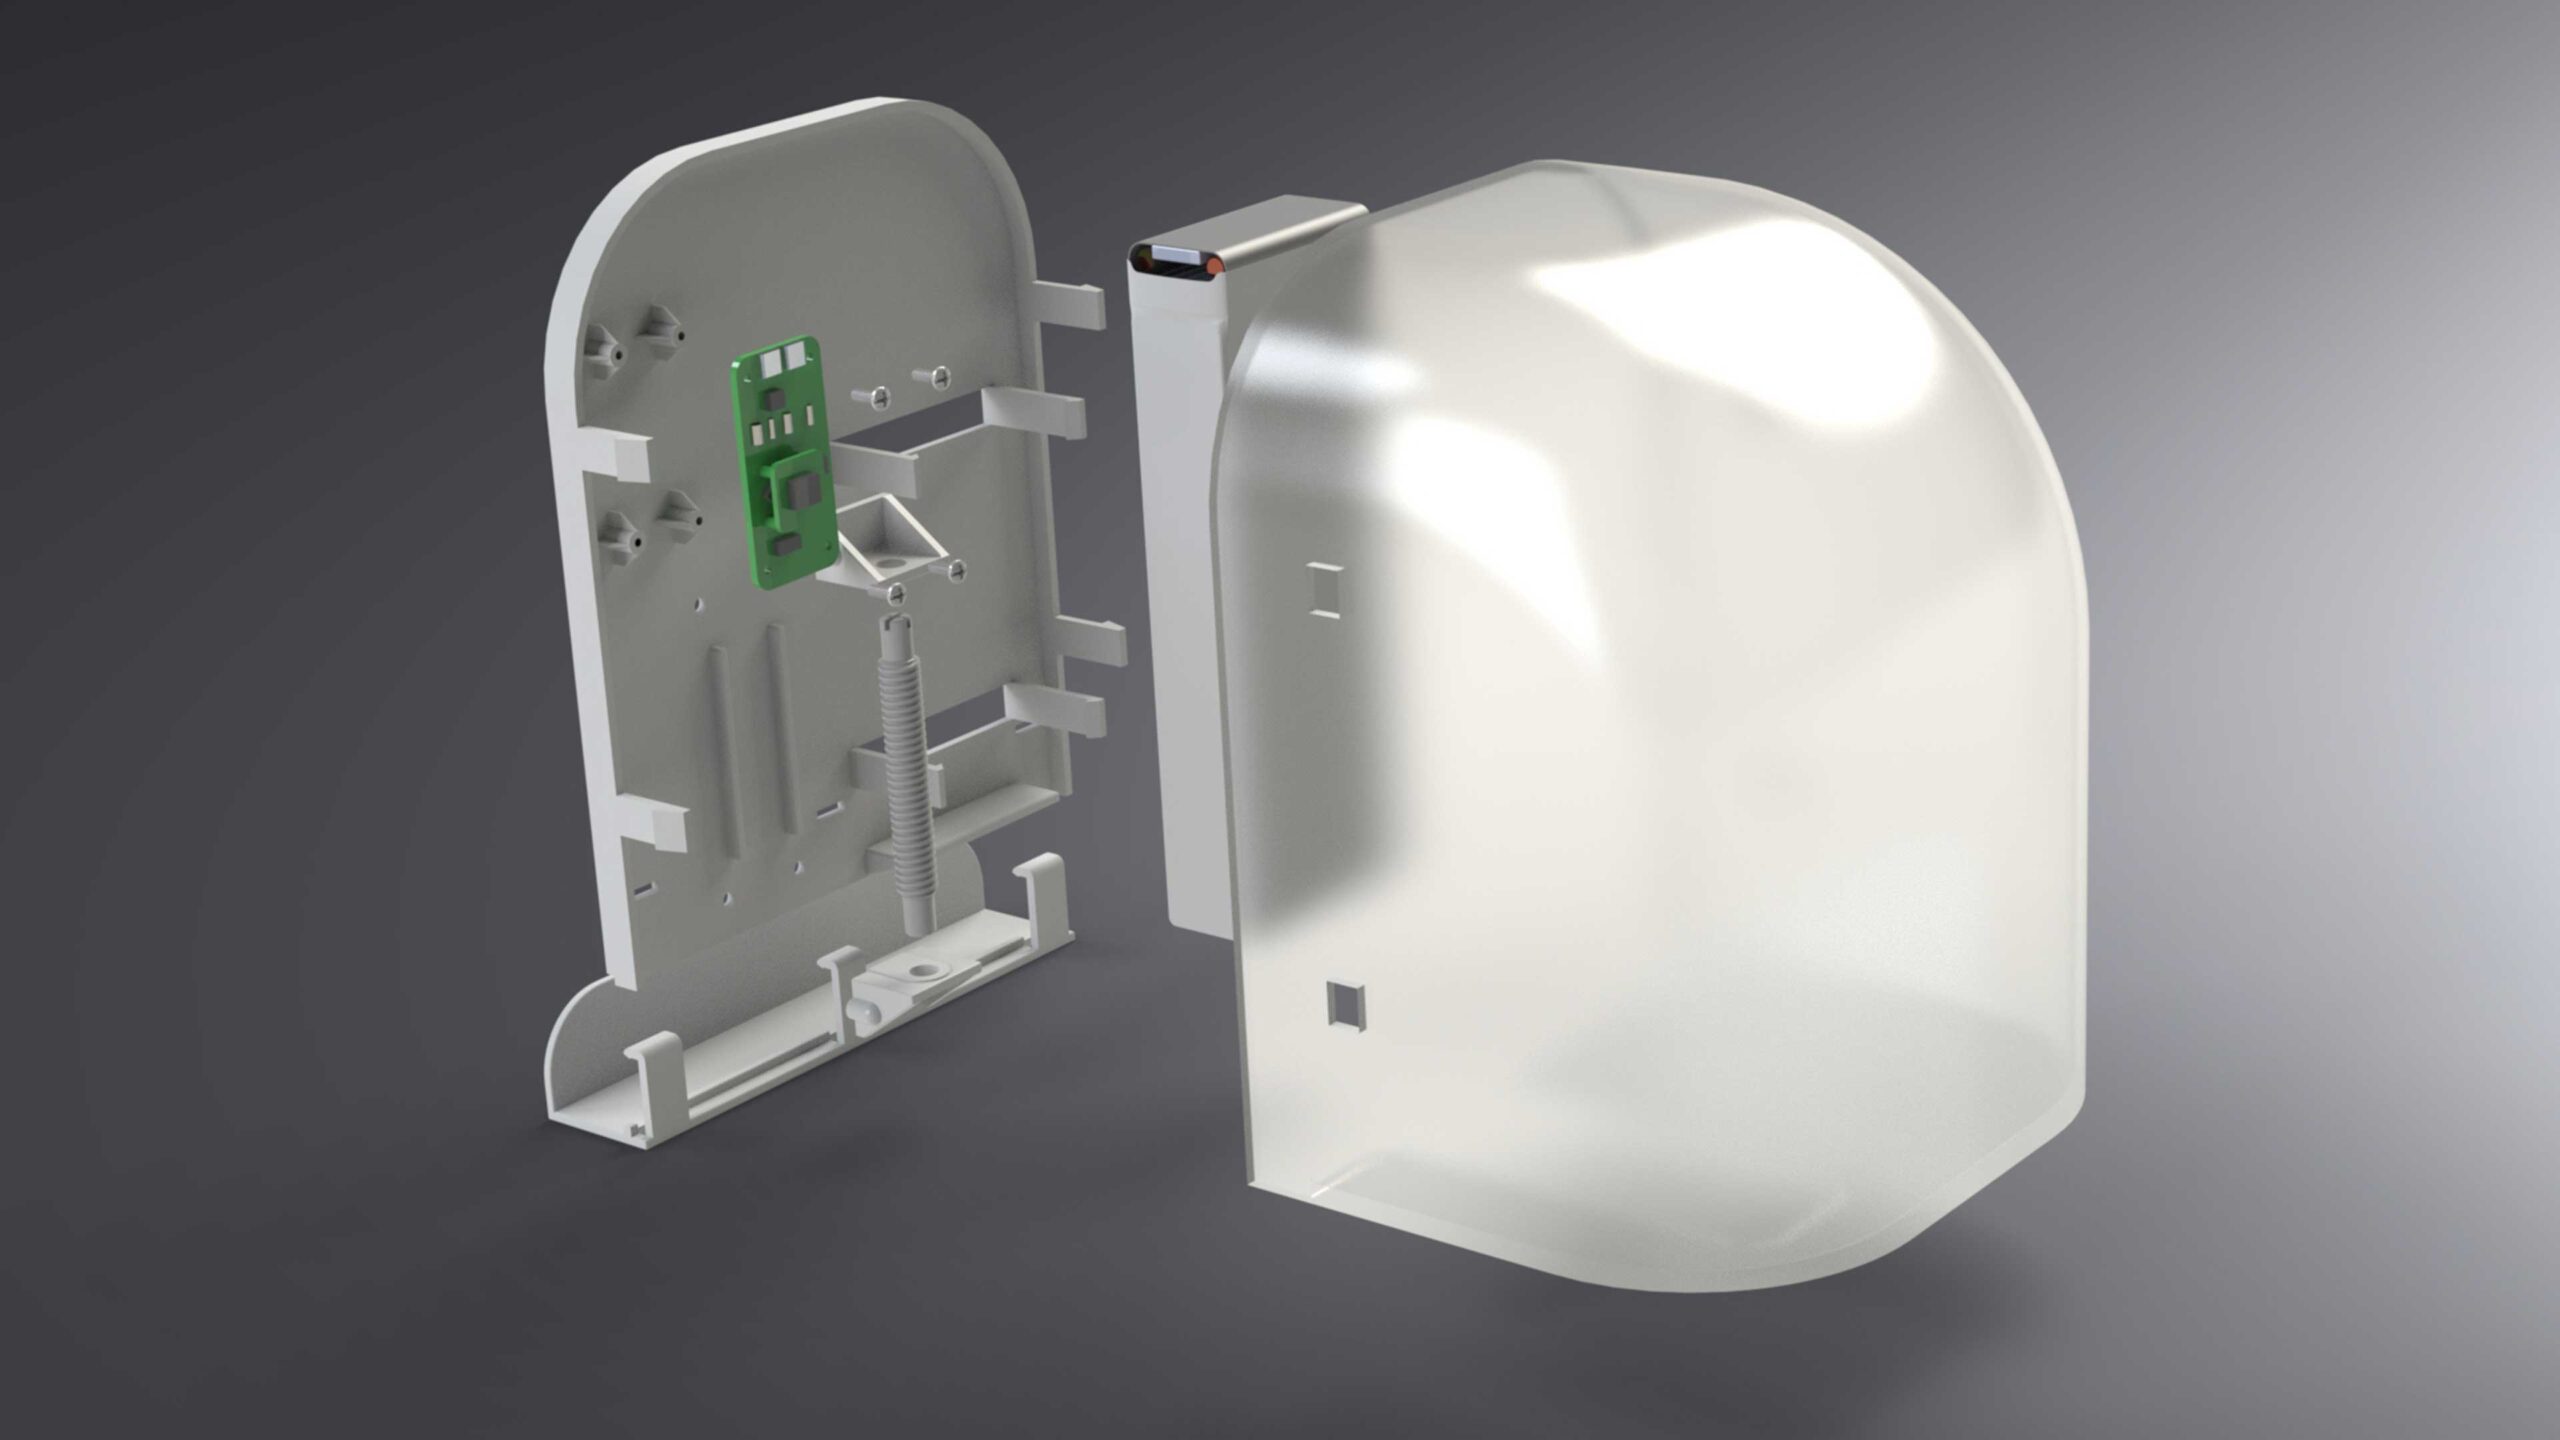
Part Redesign
For the part redesigns, we wanted to make sure that we kept core DFA and DFM principles in mind. This means reducing overall complexity and number of parts. Upon making our material and manufacturing method decisions, we realized that the majority of our parts would be injection molded. Therefore, our redesigns needed to eliminate undercuts, and include draft angles (so that the part could be removed from the mold), as well as maintain a fairly uniform thickness (to avoid material warping while cooling).
Manufacture Method /
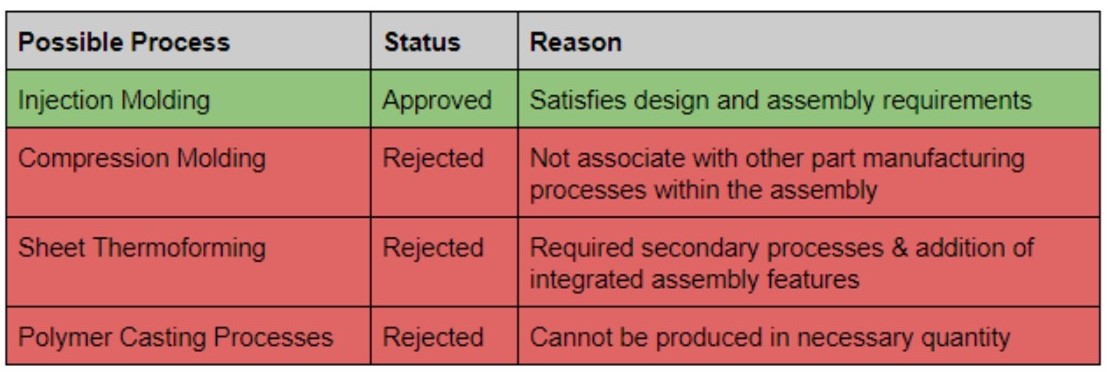
Material Selection
While making material selections, we wanted to take into account properties such as strength, density, stiffness, etc. to make sure that the chosen material met the needs of our part(s). We used Ashby charts like the one shown here to help us with this process. We also made sure to select materials that were compatible with our manufacturing methods, which had to be cost efficient and capable of producing the correct quantity of parts in a reasonable amount of time. the product into more manageable subassemblies.
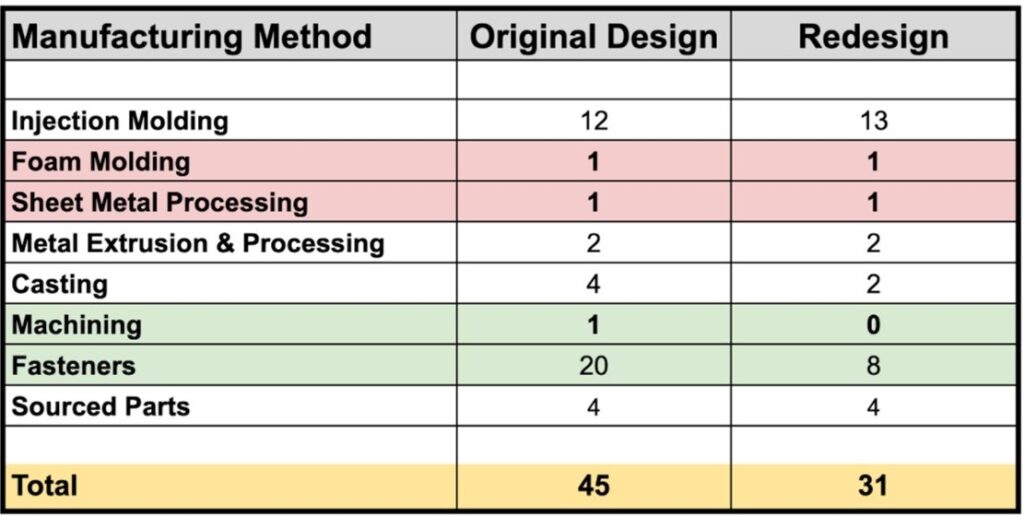
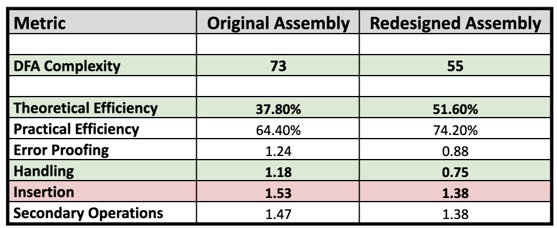
Cost / DFA Analysis
Although as designers we would love to create a product that is as beautiful as possible, using the highest quality materials, etc. It’s important to understand that products are designed and produced to be sold. To allow a company to earn the largest profit possible, we have to maximize the difference between the total revenue and the total expenses. This typically means making compromises in regards to materials, design decisions, etc. without sacrificing the quality of the product to the point where sales decrease. The charts shown here helped us keep track of product complexity and, ultimately, cost.
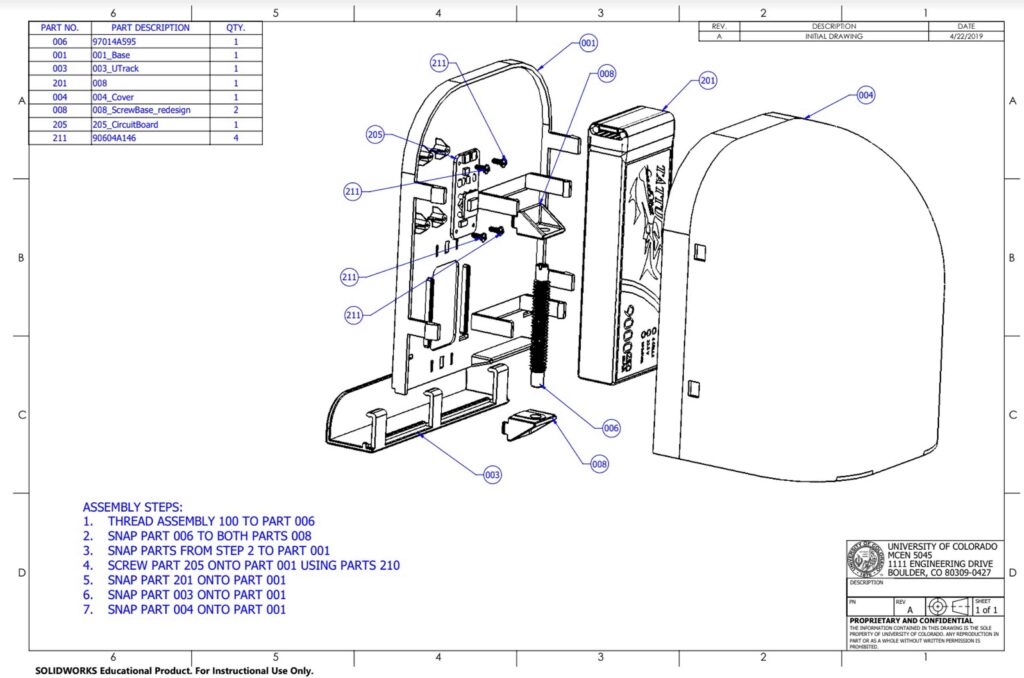
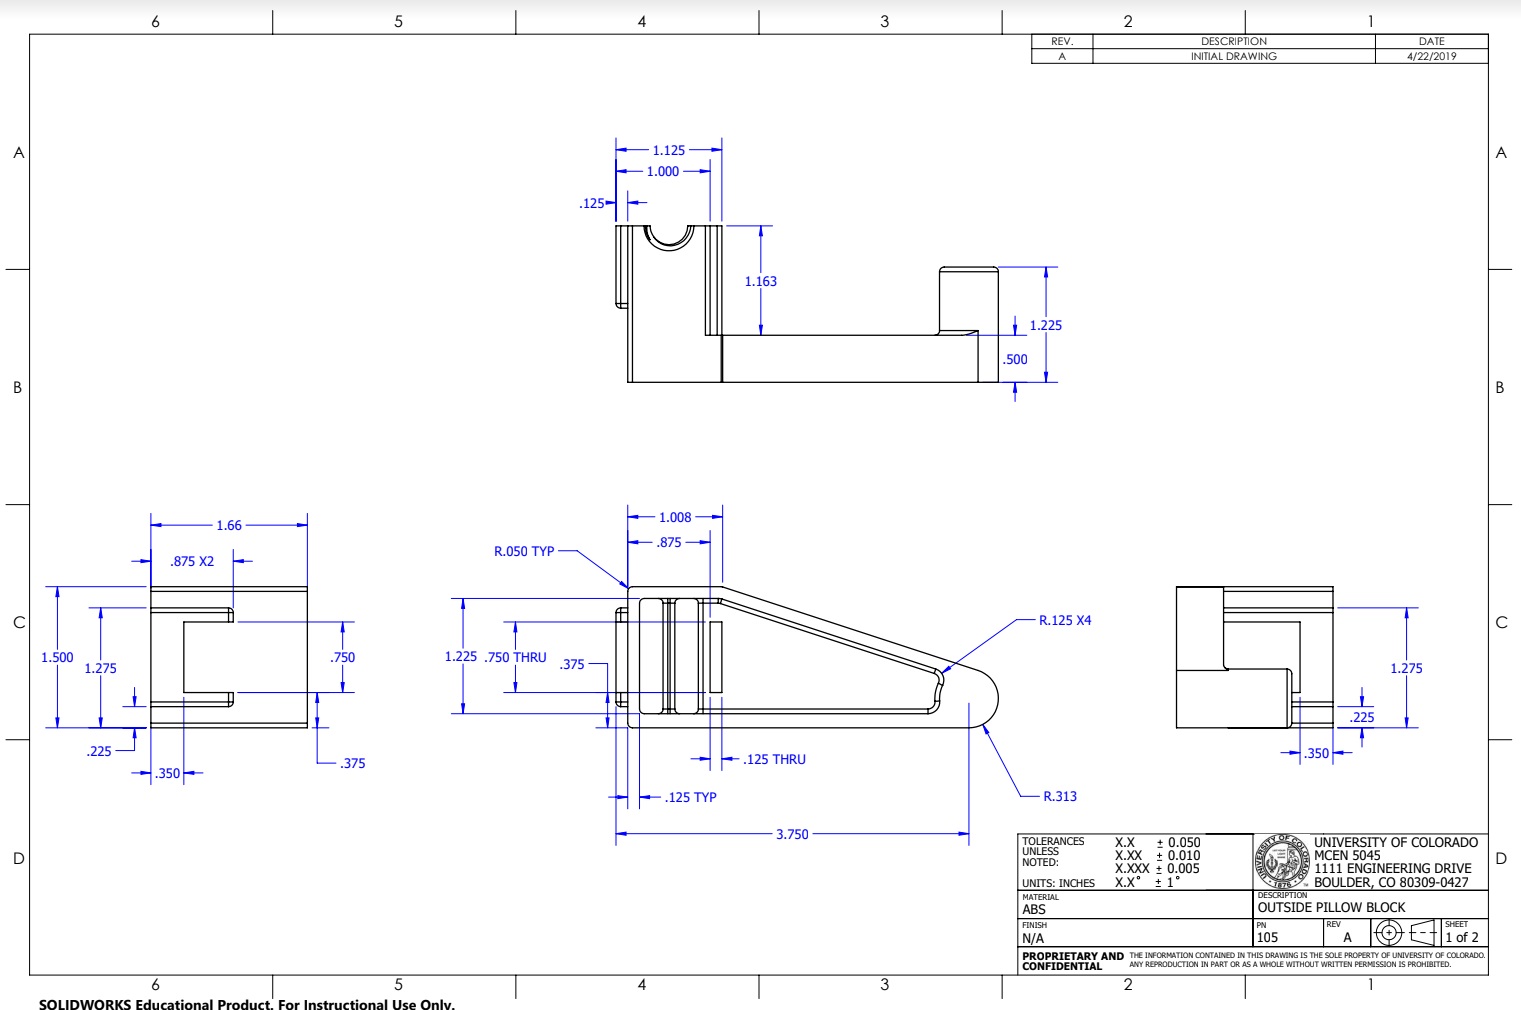
Engineering Drawings
For our engineering drawings, we wanted to make sure that we created drawings that we could hand to a manufacturer so that they could produce the parts without need for additional clarification. This meant making the drawings easy to interprate (showing all proper angles, no crossing reference lines, etc.), making sure tollerances were reasonable, and making sure that the drawings were not overdefined.